How to descale Breville espresso machine? Jump into our guide and learn how to clean and descale your espresso maker step-by-step.
Every cup of coffee consists of almost 99% water.
Naturally, you want to use the best water possible. And to make that happen, there shouldn’t be any limescale in your Breville machine.
So what can you do?
Descale it regularly, of course!
If you don’t know how don’t worry. I’ve researched every model and managed to sum up a quick guide for descaling each of them.
So let’s see how to descale Breville espresso machine.
Breville Espresso Machine: Cleaning & Descaling
Descaling your Breville espresso maker is a must – if you want it to last you a long time. And the thing about Breville models is that they’re all rather simple to use.
In some cases, you might need to flip through the manual for precise instructions. But it’s not like you need to take notes and revise every day to remember them.
Still, there are some differences between the models, especially when it comes to the descaling process. So, here’s how you can deep clean every Breville coffee machine.
Breville Barista Express
Let’s start with the most popular one, the Barista Express.
Now, descaling this machine is relatively simple, but it requires your input throughout the process. That’s because every part of the machine has to be descaled separately.
Here’s what you need to do:
- Start by dissolving the descaling powder sachet into 33 ounces of water, then fill the tank with it. Place a large container under the spout and the frothing wand.
- With your machine off, press and hold the 2-CUP button. Simultaneously, also press and hold the POWER button. This should turn on the descaling mode, and the machine should start heating up at this point. Once ready, POWER and 2-CUP buttons, as well as CLEAN and HOT WATER/STEAM indicators, will light up.
- First, you’ll descale the coffee component. To do that, press the 1-CUP button. This part should take about 25 seconds, throughout which the 1-CUP button will blink.
- Next are the steam and hot water components. For steam, you need to turn the steam dial to the right and wait about 13 seconds.
- Then, turn the steam dial to the left to descale the hot water component as well. This takes no more than 8 seconds. Once done, turn the dial back to the original position.
After you go through all three components, you should have about half the solution left in the water tank. If you’re in a hurry, you don’t have to run the cycle again, but I definitely recommend using up every drop of the solution.
So, in other words, run the whole thing again until the cleaning solution is all gone.
And then, you want to do a quick rinse. Trust me, you don’t want a drop of that solution in your coffee.
To do the rinse, you just need to rinse the water tank and refill it with fresh water to its maximum capacity.
Then, just repeat the steps to make sure your machine is free from residue.
Barista Pro and Infuser
These two models have pretty much the same descaling process as the Barista Express. That means you need to descale each part individually and manually.
So, what’s different?
Well, you enter the descaling mode on the Barista Pro slightly differently:
- Press the MENU button to enter the main panel.
- Navigate through the panel using the GRIND AMOUNT dial, choose DESCALE, and press to select it. Once the 1-CUP button illuminates, you’re in the descaling mode.
Unlike most other models, Breville Barista Pro needs to be turned on to access the mode.
The Infuser is the same as Barista Express in this case. To turn the descaling mode on, you need to:
- Press and hold the 2-CUP button while the machine is off.
- Then, simultaneously, press the POWER button to enter the descaling mode.
The rest of the process is the same as Barista Express for both of these machines.
NOTE
Remember to place a large container underneath the spouts for collecting water from the espresso maker.
Oracle
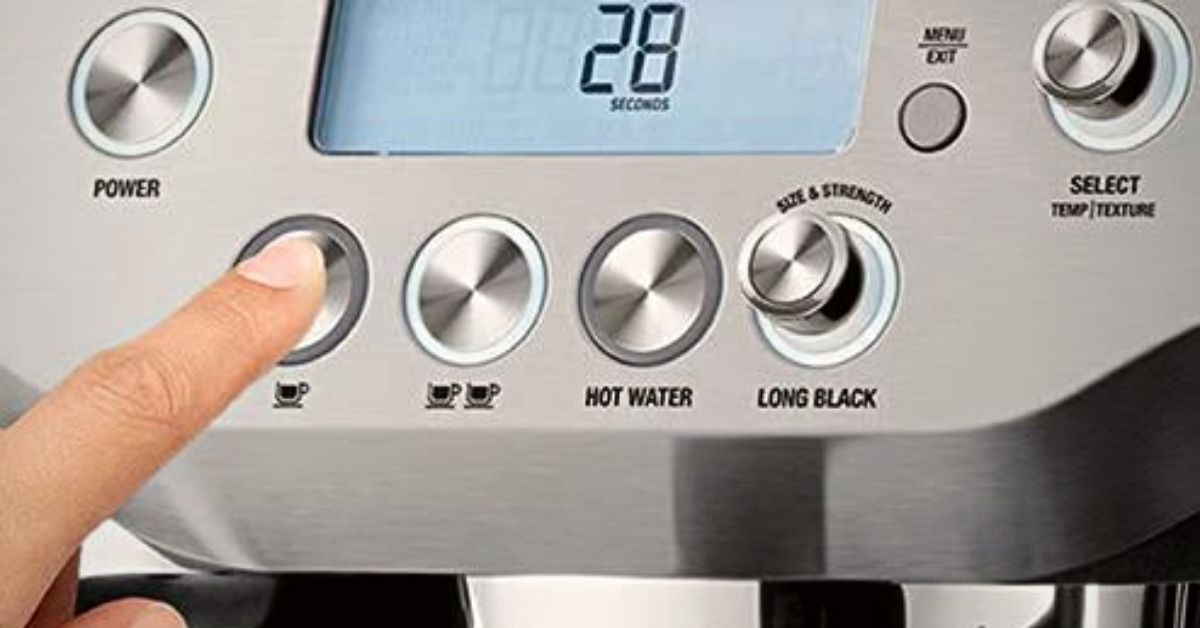
To descale this model, you’ll need a small flathead screwdriver.
Don’t worry, we’re not playing Bob the Mechanic at home. You don’t need to take the whole thing apart. You just need to screw and unscrew two important valves for descaling. You’ll see what I mean in a second.
Here’s what you need to do, step by step:
- First, you need to get rid of any water in the drip tray.
- While the machine is still off, press and hold the 1-CUP button. While still holding it, press the POWER button simultaneously for 3 seconds. The LCD should display the “rSEt” message.
- Rotate the SELECT dial until you get to the “dESc” (which is shortened for descale mode). Press the dial to select the option.
- Alright, grab that screwdriver now, as we need to empty the boilers. On the lower front panel, there’s a grey silicone cover labeled “descale access” that you should remove. Once you do that, you’ll see two valves.
- Place a towel on the drip tray, as you don’t want to get burned by the steam from the next step.
- Unscrew the right valve with a screwdriver in a counterclockwise motion. Do that until it’s fully open and venting steam.
- Once the water stops flowing into the drip tray, screw the valve back.
- Now, it’s time for the left valve. Repeat the same thing and screw it back once the water stops coming out. Then, empty the drip tray and remove the water filter from the tank.
- Add the descaling solution to the water tank and fill it to the MAX line.
- Press the 1-CUP button to start descaling. The LCD screen should start counting down the 20-minute cycle.
- Now, repeat steps 4-8 to get rid of the water inside the boiler.
- Empty the water tank and refill it with fresh water. At this point, you want to repeat the whole thing once again, but this time to get rid of any descaler residue.
Now, I know that 12 steps sound like a lot. But the whole process is actually pretty straightforward once you try it.
Oracle Touch
Oracle Touch is pretty similar to its predecessor, the original Oracle. This is also true for the actual descaling process, which has the same steps as the one above.
But what’s great about Oracle Touch is that the machine guides you through the entire process, so you don’t even need to read it in advance. It’s practically impossible to do something wrong.
To start, simply go to “settings” and choose the “descale cycle.” Then, just follow the instructions.
Dual Boiler
This specific model works the same as Oracle and Oracle Touch when it comes to descaling.
The steps are all the same, except for how you enter the descaling mode.
Here’s what you need to do:
- While the machine is turned off, press and hold the 1-CUP button. Simultaneously, press and hold the POWER button for about 3 seconds.
- When “rSEt” appears on the LCD display, press either the UP or DOWN arrow to find the descaling mode labeled as “dESc.” Press the MENU button to select it, which will start the process.
The rest is the same as with the Oracle line.
Duo Temp Pro
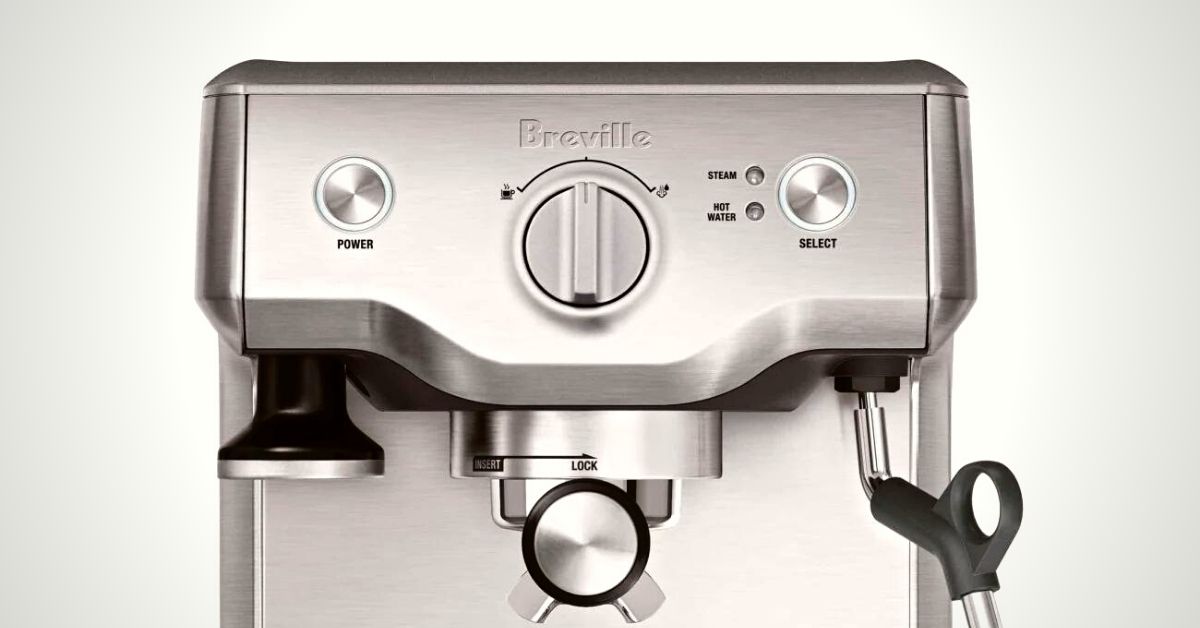
Descaling is pretty simple with the Duo Temp Pro.
Here’s how to do it:
- Before you start, ensure that the machine is switched off and the control dial is in the STANDBY position.
- Add the descaling solution to the water tank, then turn the espresso maker on.
- Grab a large container and place it under both the spout and steam wand to collect water.
- Turn the dial to ESPRESSO and let about half of the descaling solution run through the brew head.
- Then, switch the dial to STEAM, which should use up the remaining solution and push it through the wand.
- Once it’s done, turn the dial to STANDBY.
- Remove the water tank, rinse it and refill it with cold water. Then, run a rinsing cycle by repeating steps 4-6.
Bambino and Bambino Plus
These two models descale the machine in the same way.
There’s only a minor difference in the buttons used.
Namely, where Bambino uses the 2-CUP button, Bambino Plus will use the 1-CUP button.
Here’s the process for Bambino. For Bambino Plus, just switch between the two buttons:
- Fill the water tank with water up to the DESCALE line. Add the descaling solution to the water.
- Place a large container underneath both the spout and steam wand.
- Press and hold both the 2-CUP button and the STEAM button for 5 seconds to turn on the descaling process.
- Once the solution has been used up, the mode will be paused. This is where you take out the water tank, rinse and refill it to the MAX line. Empty out the container as well, as you’ll need it again.
- Press the 2-CUP button to proceed with the cycle. Now, the machine will rinse the brewing system. When it’s finished, refill the tank, and you’re good to go!
Can You Descale the Breville Espresso Machine With Vinegar or Citric Acid?
I’m sure you’ve heard about homemade descaling solutions such as lemon juice, white vinegar, or baking soda. They’re often used for cleaning different kitchen appliances, including a coffee maker.
They’re both much cheaper and easier to come by, so naturally, people tend to lean toward them.
Two of the most popular options, which you probably already have at home, are vinegar and citric acid.
Citric acid is actually the main ingredient in Breville liquid descaling solutions. So naturally, it’s safe to use for Breville machines.
However, those solutions contain other ingredients that make them even better. What I’m trying to say is that citric acid is good for your machine, just not good enough to clean it 100% on itself.
But when it comes to vinegar, I definitely don’t recommend using it. While you can use it to descale your coffee maker (if it’s made of plastic), espresso machines are built differently.
Vinegar contains acetic acid, which can damage both rubber and metal. Some Breville models have aluminum boilers, and vinegar is highly damaging to that material.
Now, I’m not saying that vinegar will destroy your machine in a single use.
In fact, you can definitely use it if your next order of descaling solution is delayed.
But keep in mind that vinegar has that pungent smell that can linger in your machine for quite a while.
How Often Should You Descale the Breville Espresso Machine?
The brand recommends descaling the espresso machine every 60 to 90 days. The frequency depends if you’re using hard water or not.
So if your water is soft, you can descale every 3 months, and your coffee will taste great. But with hard water, you want to do a cleaning cycle every 2 months instead. Of course, you can descale it more frequently. It can’t hurt.
PRO TIP
I recommend using filtered water in your Breville coffee maker and espresso machine. Filtered water is softer than tap water, plus your coffee will taste better.
Also, while the brand doesn’t specifically address this in a manual, descaling frequency depends on how often you use the machine.
So if you brew five shots a day, you’ll go through the water much faster than a person who uses the machine occasionally.
Personally, I like to descale every month. And coffee never tasted better.
I recommend doing a simple cleaning of your Breville espresso machine at the end of every day.
The simple cleaning includes:
- removing the leftover coffee grounds and rinsing the portafilter and the filter basket
- emptying the drip tray
- cleaning the steam wand
- running a water-only brew cycle
- leaning the exterior of the machine with a cloth and warm water
This will keep your machine shiny, and your morning cup of Joe will taste great.
To Sum Things Up
You should descale your Breville machine every 2-3 months to keep it in good shape.
Some models require your input throughout the process, while others do everything automatically. But in any case, the process is pretty straightforward.
And while it may take a while from start to finish, it’s well worth it. Clean water means good-tasting espresso!
Time for a new Breville machine? Here are our top picks and a buying guide for choosing the best Breville espresso machine out there.

