Tried brewing moka pot coffee and had no luck?
Updated April 2026: The moka pot has seen a major resurgence in 2025-2026 as coffee lovers move away from single-use pod machines in favor of more sustainable, hands-on brewing methods. This guide covers everything you need to know to brew great moka pot coffee.
Ended up with nothing but a bitter mess that you could barely swallow?
Or maybe you’ve just bought one and you haven’t even tried it out yet?
In any case, it’s simple. But you need to get the finesses of the brewing process right. If you do, you’ll get an excellent cup of coffee – I promise you.
In this article, I’m going to teach you how to use a moka pot to make an incredibly good brew – every time. We’ll also talk about different drinks you can make with your freshly brewed moka coffee, and how to clean and maintain your moka pot coffee maker.
Ready to get started?
Let’s jump straight into it!
How Does A Moka Pot Work?
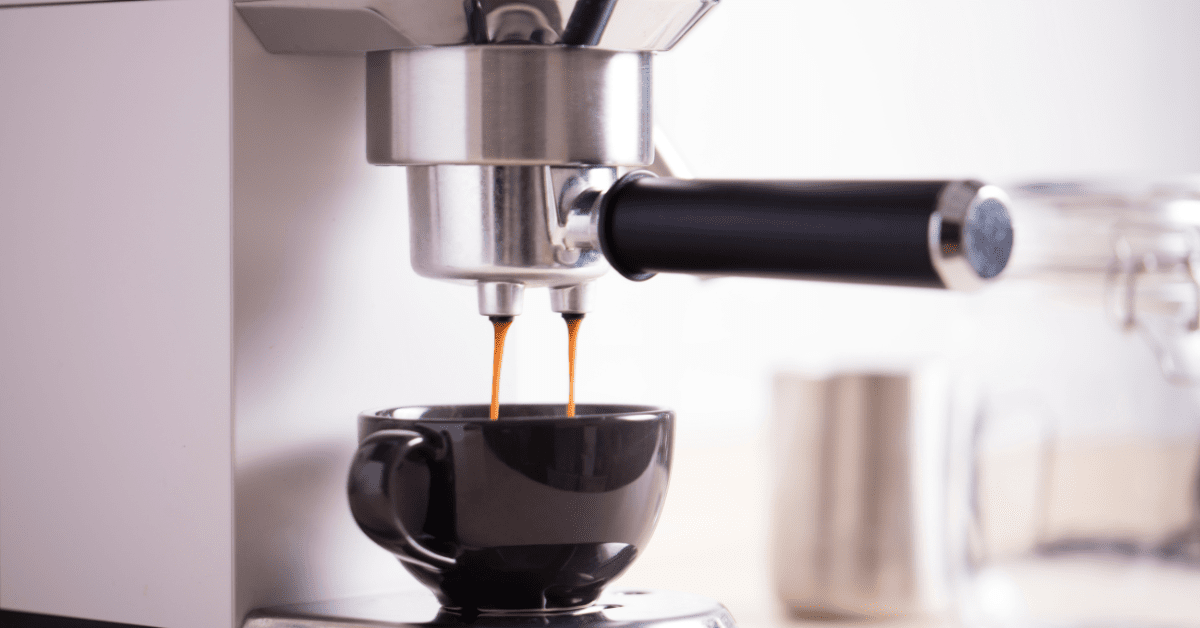
Like an espresso machine, the moka pot uses pressure to brew coffee.
In fact, the moka pot is often referred to as a stovetop espresso maker. But while the coffee it makes is somewhat similar to espresso, it isn’t actually espresso.
An espresso machine uses far more pressure than a moka pot, resulting in a distinctively different brew. Moka pot coffee isn’t quite as strong and intense as espresso. That said, it’s definitely a lot stronger than any type of drip coffee, or even a french press.
A moka pot is made up of 5 parts:
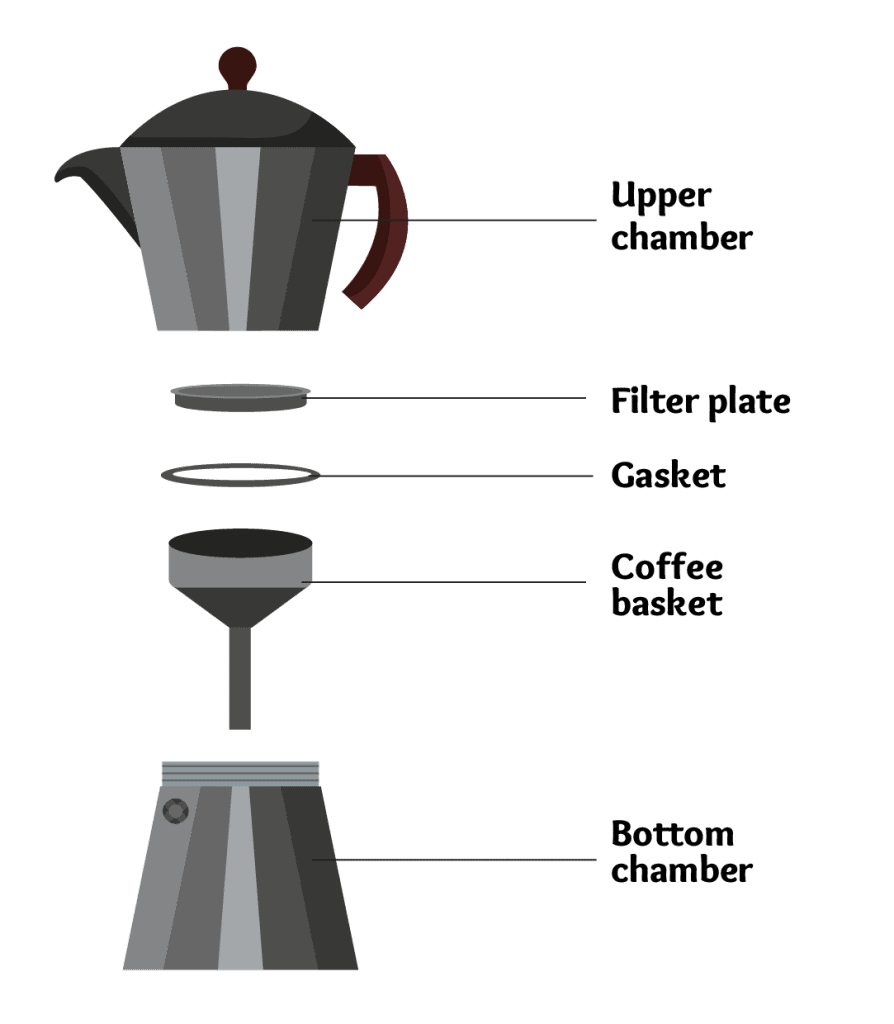
Here’s how it works, in a nutshell:
Water goes into the bottom chamber. Ground coffee goes into the coffee basket. The basket goes onto the bottom chamber, the top chamber screws on, and it’s ready to go on the stove.
As the water heats up, pressure causes it to rise through the coffee basket and into the upper chamber. A filter plate on the bottom of the upper chamber stops the grounds from passing, so what you’re left with in the top chamber is freshly brewed, ready to serve coffee.
Simple, right?
It is – but when it comes to brewing coffee with a moka pot, small details can make a big difference.
In the next section, I’m going to give you detailed step-by-step instructions to show you how to brew great coffee and get the most out of your moka pot.
NOTE
When you are buying a Moka pot, there’s a range of sizes to choose from. Moka pots have their sizes indicated in cups.
How To Use A Moka Pot
Listen up and take notes, because this is the brewing method you need to follow if you want to get the best results out of your moka pot coffee maker.
It’s pretty straightforward, but every detail is important so don’t cut any corners.
Let’s take it from the top – first things first:
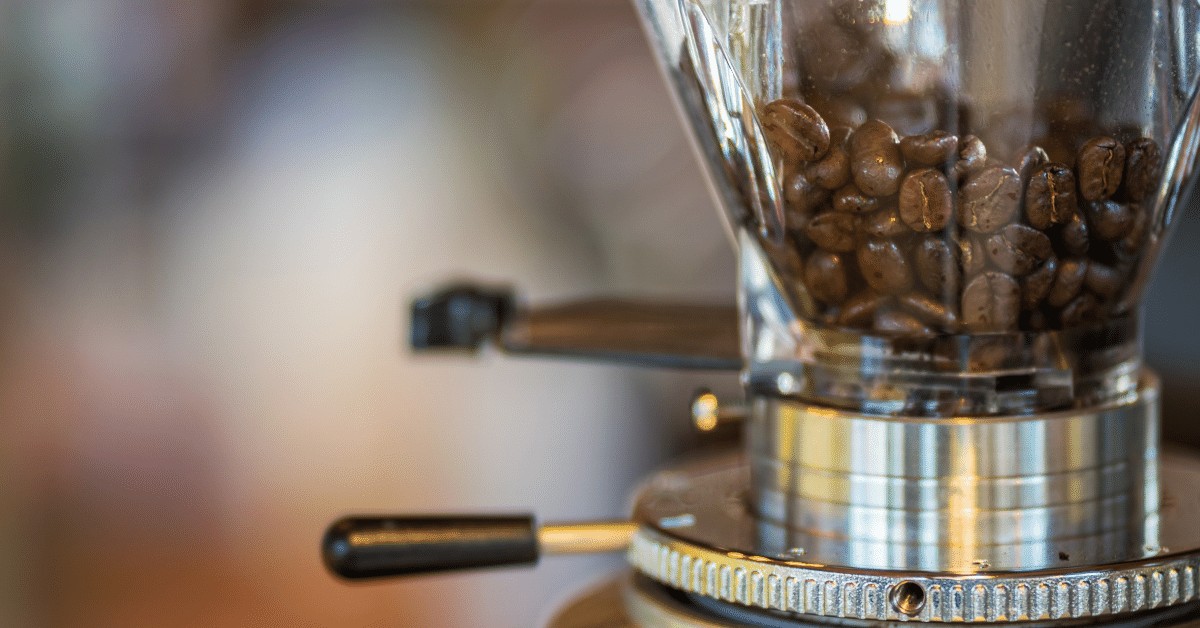
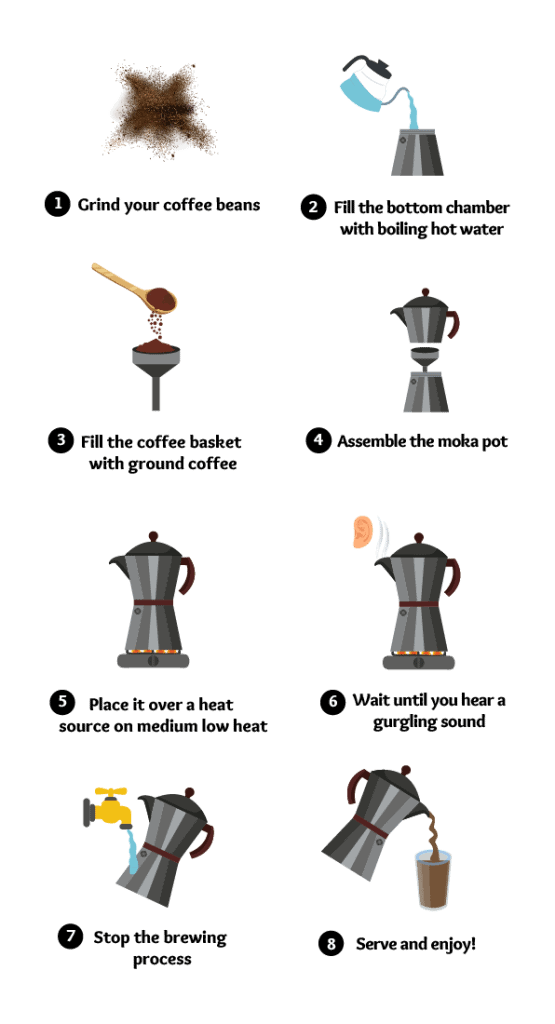
Step 1: Grind Your Beans
Before you get started brewing, the first thing you need to do is grind your coffee.
You just can’t beat freshly ground coffee. So if you don’t have a coffee grinder, I seriously recommend investing in one. It’s definitely worth it.
Of course – you can also use pre ground coffee if you wish, as long as the grind is suitable.
So, what’s the right grind for a moka pot?
The ideal grind is quite fine.
It’s a bit coarser than you’d grind for espresso. But quite a bit finer than you would for drip coffee.
Grinding with a coffee grinder is ideal, obviously. But if you don’t have one, you can still get the job done with a bunch of other things you probably do have. You can use anything from a blender or a food processor, to a rolling pin, mortar and pestle, hammer, or even a knife.
Step 2: Fill The Bottom Chamber
Next, fill the bottom of your chamber with boiling hot water.
You want to fill it up to just underneath the safety valve. There’s usually a line that shows you exactly where the chamber should be filled up to.
CAUTION: It’s very important that you don’t cover the safety valve with water. It needs to be completely uncovered – or your Moka pot could explode all over your kitchen. Literally. The safety valve is there for a reason, so don’t take any risks by overfilling the bottom chamber.
But why is it important for the water to be hot, you might be wondering?
If you use cold water, the entire time that water is heating up it won’t be the only thing taking the heat.
Guess what else is being heated?
That’s right – your coffee.
You don’t want that, because it’ll make your coffee taste bitter.
So to make sure your coffee tastes good, always use water that’s nice and hot.
Step 3: Fill The Coffee Basket
Take the coffee basket and fill it all the way up to the top with ground coffee. It should be completely full, but don’t overdo it – you don’t want coffee piled up on top.
If you get some on the rim at the top or the sides of the basket, gently wipe it off with your finger.
Do not – I repeat, do NOT tamp your coffee!
In certain circumstances, although very unlikely, doing so is actually another thing that can cause it to explode.
Want some flaming hot coffee all over your kitchen walls and ceiling?
Yeah, didn’t think so.
Step 4: Assemble The Moka Pot
Place the coffee basket onto the bottom chamber.
Next, screw the top chamber on.
And that’s it! It’s ready to brew.
Note: It’s important that you make sure it’s all screwed together nice and tight before it goes onto a heat source.
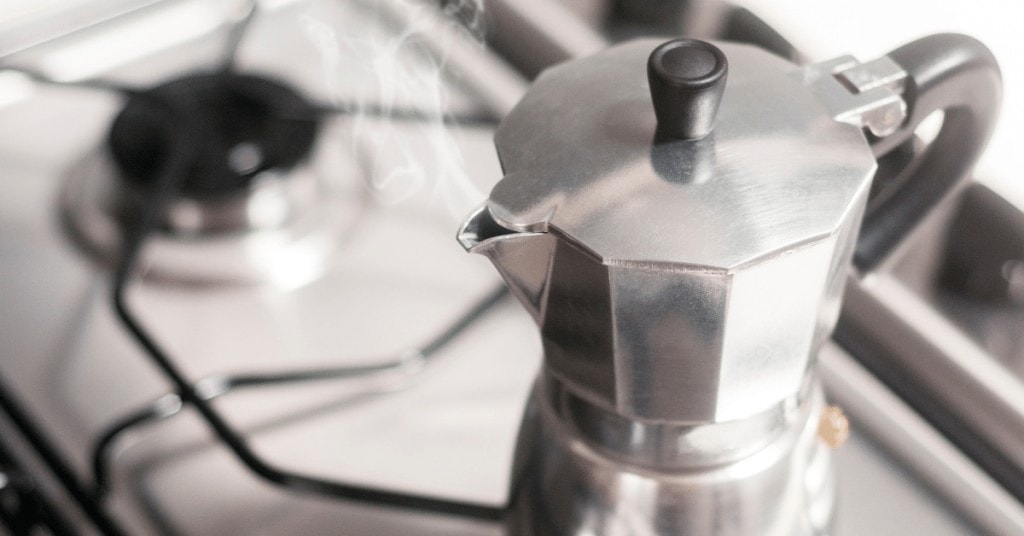
Step 5: Place It Over A Heat Source
After you’ve assembled the moka pot, you should get it onto a heat source pretty quickly.
But don’t make the mistake of putting it on high heat. You want to put it on medium low heat.
Within a few minutes, your coffee will begin to brew.
You can keep the lid up and watch it brew if you like. But I prefer to keep it closed, just in case it splutters towards the end.
Step 6: Wait For The Coffee To Brew
Now, the waiting game. It’ll take around 5 minutes for your moka pot coffee to brew.
You’ll know it’s done when you hear a gurgling sound.
You might be tempted to go off and do something else while your coffee is brewing.
Don’t.
Believe me, it’s a bad idea.
Once you start to hear that gurgling sound, you want to take your moka pot off the heat source immediately. So, you need to be around in time for that moment, or your coffee will burn – and that’ll make it taste bitter and nasty.
Step 7: Stop The Brewing Process
As soon as you take it off the heat, you should stop the brewing process.
You can do this is one of two ways:
- By holding the moka pot over the sink and running the bottom chamber of the moka pot under cold water
- By wrapping the bottom chamber in a cold, wet towel
Why go to the trouble of doing this?
It’ll stop the extraction process at exactly the right time, so that you don’t end up with overextracted coffee.
Cause that’ll also give you…
*drumroll*
…you guessed it – an overly bitter brew.
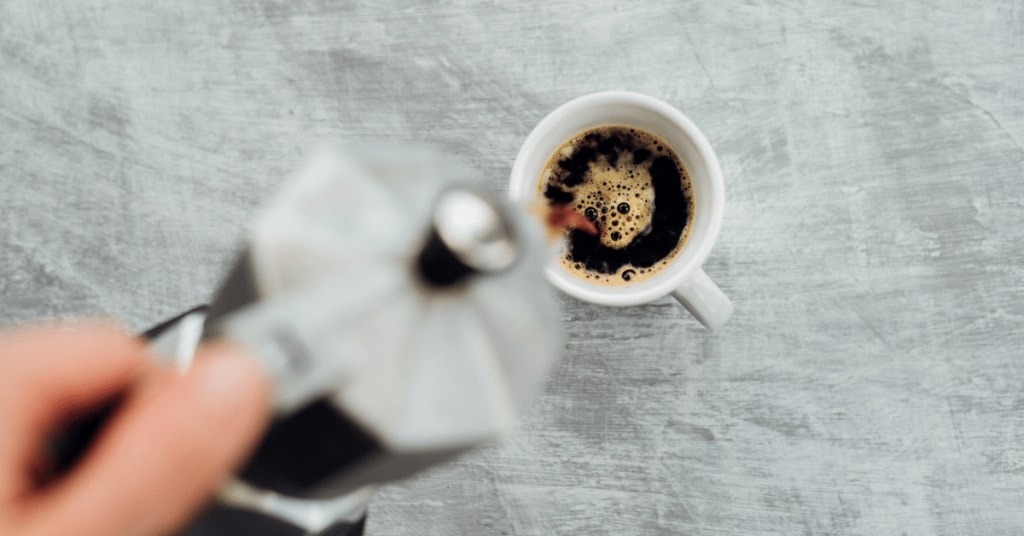
Step 8: Serve
Now, all that’s left to do is serve your moka pot coffee.
But before you pour it into a cup, give it a quick stir with a spoon.
Why?
It unleashes more of the wonderful flavors and aromas of the coffee. In fact, with a lot of coffee brewing methods it’s a good idea to give your fresh brew a good swish or stir before serving, and moka coffee is no different.
You can enjoy your moka coffee straight as is, or you can mix it with water or milk for a longer, less intense coffee drink. But we’ll get into that in more detail further on down.
Moka Pot Cleaning & Maintenance
Taking care of your moka pot is essential. Cleaning it properly after each use is one of the most important aspects of ensuring your moka pot continues to make great coffee year after year.
Some people might try to tell you that a build up of coffee residue in your moka pot is a good thing. They’ll argue that it contributes to the taste of your moka coffee.
Don’t listen to them.
Built up residue of old coffee in your moka pot will do nothing but add bitterness and ruin the taste of your coffee. So, to avoid this – you need to make sure you give your moka pot a good, thorough clean after every use.
How To Clean A Moka Pot
It’s simple, really. All you have to do is disassemble your moka pot (once it’s cooled down enough, of course) and rinse all the parts thoroughly under running water.
But disassembling it doesn’t just mean unscrewing the top and bottom chambers and taking out the coffee basket. You also need to remove the rubber seal that sits underneath the top chamber, as well as the metal filter – and rinse those off too.
CAUTION: Never use any type of detergent or soap to wash your aluminum moka pot. It’ll taint the aluminum, which will mess with the taste of your coffee. You should also never put it in the dishwasher, even if you don’t put any detergent in, as it’ll oxidize the metal pretty quickly.
If your moka pot is made of stainless steel, you can use a mild detergent and wash your moka pot in the dishwasher if you wish to do so. That said, it isn’t really necessary. As long as you give your moka pot a thorough rinse after each use, you shouldn’t have any trouble.
After you’ve rinsed your moka pot so that there isn’t any coffee residue left on it, pat it dry with a clean cloth. Then, let it dry out completely before reassembling it.
Another thing to note is that you should never screw your moka pot together tightly when you’re not using it. This will cause the rubber seal to wear down a lot quicker than it will if you screw it together loosely when not in use.
Although, you can always buy a replacement rubber seal, so it’s not the end of the world.
What About Deep Cleaning?

Despite your best efforts, you might still end up with some residue on your moka pot after many uses.
Calcium deposits from water can also build up in your moka pot over time. These can cause blockages that may even turn your moka pot into a safety hazard. If you let it get too bad, your moka pot could explode mid brew. Yikes!
But don’t fret – you can get your moka pot looking shiny and new again.
You just have to give it a deep clean to get it sparkling like it used to.
But how do you do that without damaging it?
Vinegar and lemon juice, baby!
Whether you have an aluminum or stainless steel model, a tablespoon of vinegar and a tablespoon of lemon juice are safe to use and will get the job done.
Here’s how you do it:
- Put a tablespoon of vinegar and a tablespoon of lemon juice in the bottom chamber of your moka pot.
- Fill it up the rest of the way, past the safety valve all the way to the top with warm water.
- Let it sit for 2-4 hours.
- Pour a little bit of the mixture out until you uncover the safety valve completely.
- Assemble the moka pot and put it on the stove over low to medium heat until all the water passes through to the top chamber.
- Empty the moka pot, disassemble it, and give each part a good rinse under running water.
- Pat each part of the moka pot dry with a clean cloth and leave it to dry completely before reassembling it.
How often you’ll need to do this depends on how hard the water is in the area you live in. But generally speaking, once a month is a good rule of thumb to follow.
Drinks You Can Make With Your Moka Coffee

Just like espresso, you can use your moka pot coffee as a base for all kinds of delicious coffee beverages.
Americano, cappuccino, latte, macchiato, and any other type of coffee drink you can think of. All of your favorites can be made just by subbing the espresso in each recipe for moka coffee.
Pretty cool, huh?
It’s also great for making iced coffee. Just pour freshly brewed moka coffee directly from the pot into a glass of ice and add a little milk or water. Iced coffee is my favorite, so I probably use my moka pot for this more than anything else.
And let’s not forget about Cuban coffee. The moka pot is incredibly popular in Cuba, and Cubans most often use it to make their famous cafe Cubano – otherwise known as cafecito.
To make cafe Cubano, put 2 teaspoons of sugar in a cup. When you put your moka pot on the stove, keep the lid open and wait for the first few drops of coffee to come out. Pour those into the cup with the sugar, and quickly put the moka pot back on the stove to continue brewing.
While the rest of the coffee is brewing, stir the sugar and coffee vigorously until you get a thick, foamy consistency. As soon as the moka pot finishes brewing, pour the rest of the coffee into the cup and give it a slow, gentle stir. Et voila!
Note: If you’re making a larger batch of cafe Cubano, add all the sugar for all the cups into 1 cup and mix it together with the first few drops of coffee. Then, divide the foam between the cups before adding the rest of the coffee to them.
Last Little Bit Of Advice
If you’ve followed all these steps carefully and you’re still not getting good coffee, there are a couple of things you might be doing wrong.
If your coffee is too bitter, it’s overextracted. You can try using a grind that’s just a bit coarser, or brewing on lower heat.
If it’s too weak, it’s underextracted, so you’ll want to do the opposite – a slightly finer grind.
And if the moka pot leaks while it’s brewing, take it off the heat immediately to be on the safe side. It could be leaking for a number of reasons, from tamped grounds, to an overfilled coffee basket, or too fine of a grind.
But if you follow all the advice in this article carefully, you shouldn’t have any of these issues.